Help Center
Luma Cameras: How To Use The Luma App For x10 Systems
The Luma Surveillance app is an effective app for interfacing with your cameras; however it does not explain any of the features and some of the most important features may be unintuitive to some users. This guide is just a crash course on all of the important functions, including how to share images and video in the case that you need to provide valuable information to law enforcement or others. All of the functions in this guide can be performed either at home, or away from the property. If away from the property, please ensure you have good cell service or are on a Wi-Fi network.
How to access recorded footage.
- Open the Luma Surveillance app.
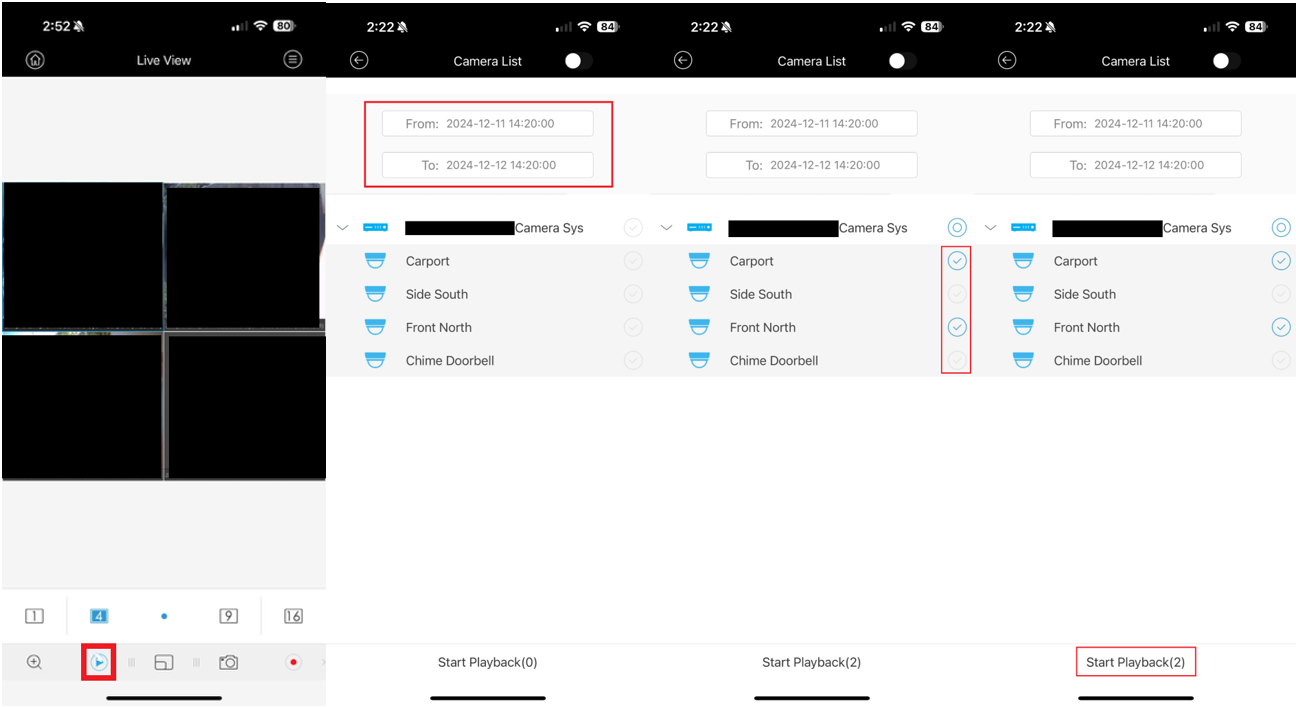
- Tap the playback icon at the bottom of the Live View screen.
- Playback is also an option in the Home Menu in the top left corner of the screen.
- In the playback menu, set the time frame you wish to see, and then select up to 4 of the cameras in your system.
- Please be aware, this generation of Luma products, by default, saves footage based on motion or event detection. So you may find large swaths of time where nothing was recorded.
- This configuration is generally beneficial as it allows for significantly more storage of footage where things were happening vs most of your hard drive being consumed by nothing happening.
- Please be aware, this generation of Luma products, by default, saves footage based on motion or event detection. So you may find large swaths of time where nothing was recorded.
- Tap “Start Playback” at the bottom of the screen.
Reviewing footage.
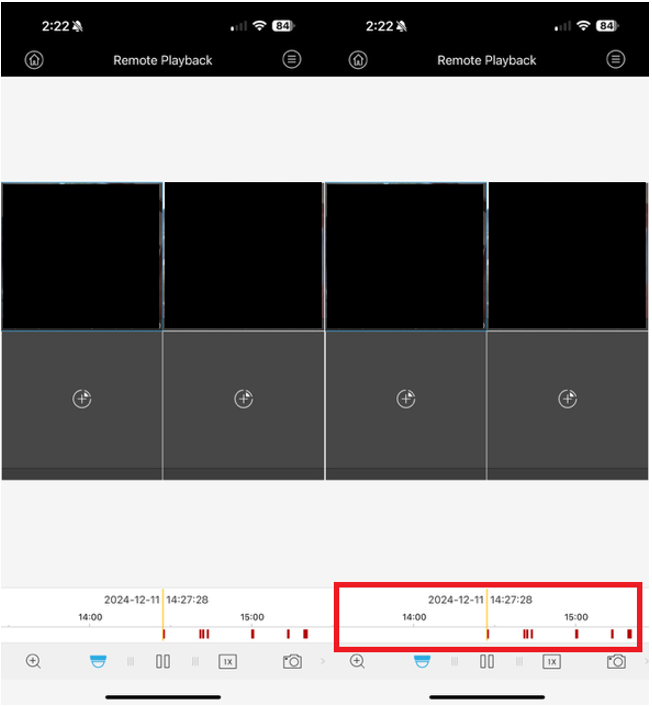
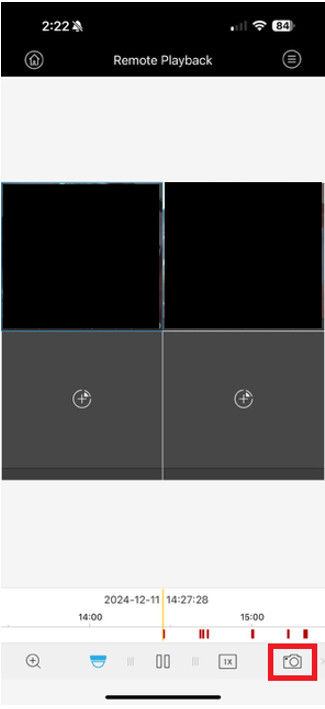
- Select a camera stream
- The currently selected camera has a faint blue line around the edge of the camera image.
- The selected camera will indicate the footage it has recorded by the red lines in the date/time window towards the bottom of the screen.
- Quickly scroll through available footage by dragging the date/time left or right. The yellow line indicates the moment in the footage you are
Functions of critical icons:
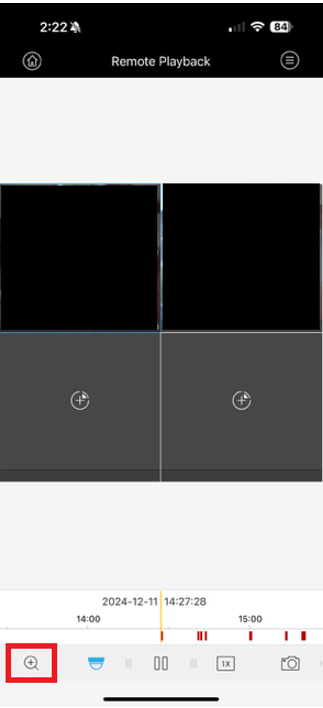
- Zoom Icon (Magnifying Glass)
- Selecting this icon gives you the ability to pinch zoom on the live stream or recorded footage of a single camera.
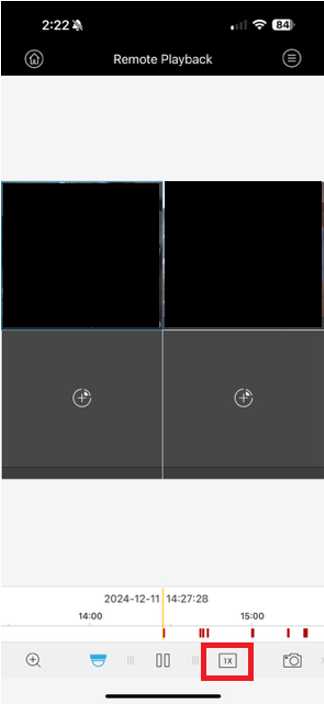
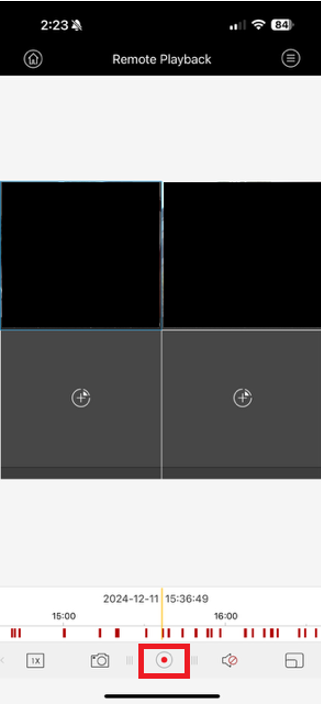
- Playback Speed Icon (“1x”)
-
- Shows the current playback speed. Selecting this icon allows you to change the playback speed of recorded footage for a more expedient viewing experience.
- Shows the current playback speed. Selecting this icon allows you to change the playback speed of recorded footage for a more expedient viewing experience.
-
- Snapshot Icon (Camera)
-
-
-
-
- Saves a snapshot of the currently selected camera stream. IT DOES NOT SAVE THE IMAGE TO THE PHOTO ALBUM ON YOUR PHONE. The picture is saved in the snapshot section of the app. Accessing saved snapshots is covered later in this guide.
- Saves a snapshot of the currently selected camera stream. IT DOES NOT SAVE THE IMAGE TO THE PHOTO ALBUM ON YOUR PHONE. The picture is saved in the snapshot section of the app. Accessing saved snapshots is covered later in this guide.
-
-
-
-
- Recording Icon (Red Circle/Dot)
-
-
-
- When selected, the app begins saving footage from the selected camera stream for review or exporting later. The footage is still saved in the app, not your phone’s photo album. Recording continues until the recording icon is pressed again. Later in this guide, we will cover how to export this saved footage.
- When selected, the app begins saving footage from the selected camera stream for review or exporting later. The footage is still saved in the app, not your phone’s photo album. Recording continues until the recording icon is pressed again. Later in this guide, we will cover how to export this saved footage.
-
-
-
- Image Quality Icon (Eccentric Squares)
-
-
-
-
- The image quality icon allows you to increase the image quality of a selected camera, image quality is MEDIUM by default to facilitate quick searching and minimize buffering.

- The image quality icon allows you to increase the image quality of a selected camera, image quality is MEDIUM by default to facilitate quick searching and minimize buffering.
-
-
-
-
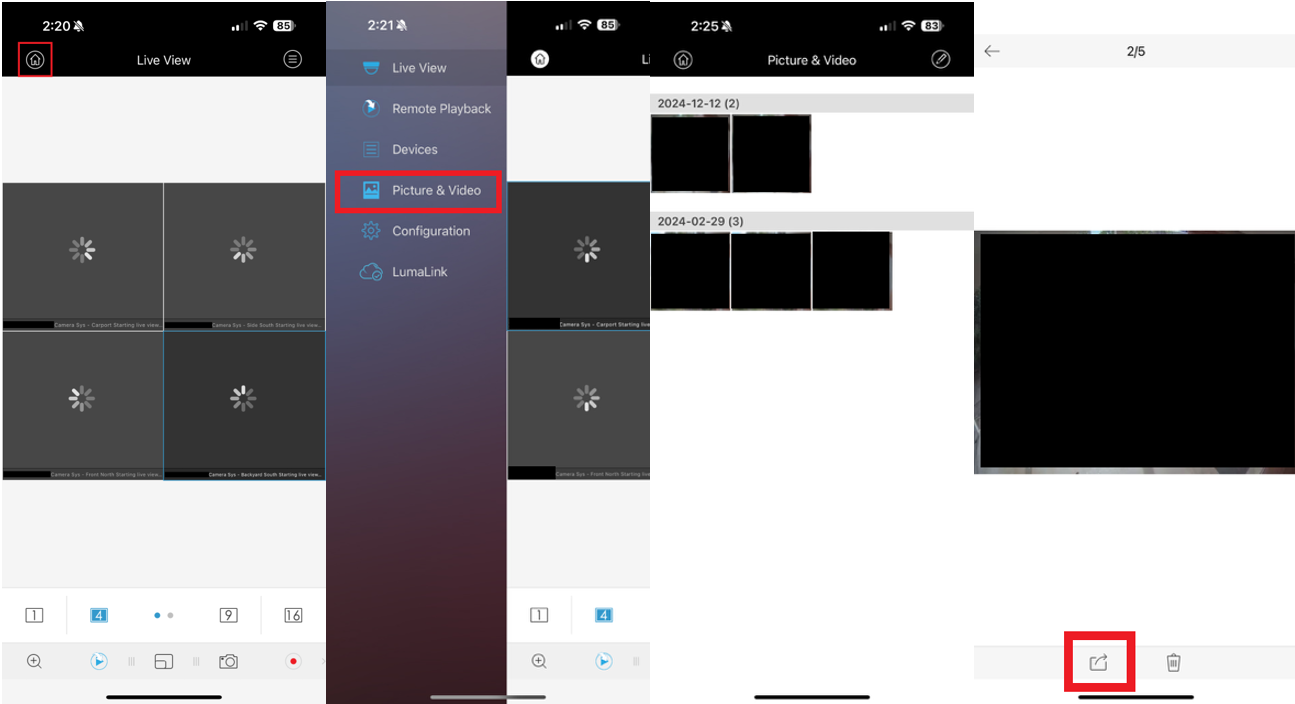
How to export saved recordings and snapshots:
- Using the snapshot and record functions described above in the “Functions of critical icons” section of this article, you will have saved pictures and videos available for export in the Luma App.
- Tap the menu button in the top left corner.
- Select “Picture & Video” from the menu.
- Choose a saved snapshot or video from the list
- Tap the export icon at the bottom of the screen.
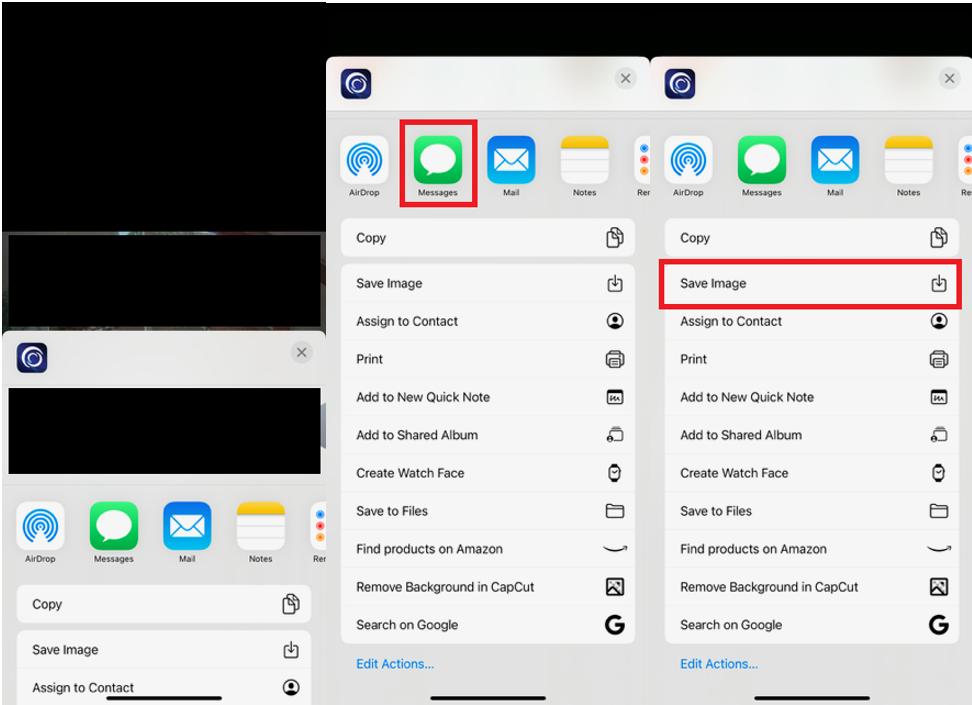
- Depending on your needs, you may want to either send the footage via text or save the footage to your phone’s photo app for permanent storage.
-
- From the list of options select either the messaging app or the “Save to photos” option (even if it’s a video).
- This is a great tool if you need to quickly provide police with footage; however, THIS FOOTAGE OR IMAGE MAY NOT BE ADMISSIBLE IN COURT. Please contact your installer or a Luma dealer to aid you in retrieving properly watermarked footage from your recorder.
- Please do this soon after an event, so that footage is not recorded over.
- Please do this soon after an event, so that footage is not recorded over.
-